
Last spring/summer, I was on a mission to give our front porch a facelift. It is a beautiful outdoor space, but I had never taken anytime to make it anything more than a place to sit. The overhaul involved several DIY projects and repurposing items we already had. I was really pleased with how it turned and we spent lots of time truly enjoying the new porch decor over the summer months. However, when fall rolled around, I quickly realized that the design was much more suitable for summer and that I would need to somehow “winterize” the look.
Over the past few months, I haven’t had much time for projects, but I did spend several hours gathering ideas and materials. Last weekend, I finally took the time and pulled many of them together to create a new look for winter and Christmas. I didn’t want it too be too Christmassy because I really didn’t want to have to rethink the space when the holidays are over. I think I managed to create a look that has a hint of Christmas, but with a few minor changes, it can transition into a look that will last the entire winter.
To achieve the look, I incorporated some of the pieces that I had used in my summer porch design such as the milk can and the Welcome sign. I may make a Christmas sign at some point, but for now this will work.
I had originally made this rustic tree branch tree for my front porch, but in the end, loved it so much that I decided to place it in the living room because our main tree is always set-up in the dining room where there is more room. We have a wood burning fireplace in the living room and having a smaller tree in this space will be perfect. (It is yet to be moved as we won’t be getting our live Christmas tree until next weekend!)

Pallet Trees:
I love the look of pallet Christmas trees and decided to pick some up through Kijiji. Although there are many places that offer them for free, I ended up purchased two for $30. That might seem silly but they were already stained a dark brown colour and there were no spaces between the planks, so there were plenty of planks to work with.


- The first thing I needed to do was dismantle the pallets. This is never a fun job, but I opted for what I deem to be the simplest solution. Use a sawzall!
2. Once the pallets were taken apart, I began to cut, build and assemble. I followed this tutorial from Funky Junk Interiors. I absolutely love the tree she created with old fencing, but I didn’t have the time or energy to recreate the look. The tutorial is super easy to follow and the only change I made was making the bottom plank on my largest tree larger so that the finished tree would be taller. I was on a bit of a roll and ended up making two larger trees for my front porch as well as three smaller ones…and I still have wood left.


3. Once my trees were built, I opted to finish off the look by adding some white using the “dry brush” technique. (Dry brushing is really just what it implies…you add a very sparse amount of paint using a very dry brush and apply it with very light strokes. This may also mean removing some of the paint you put on brush before actually applying it to the surface of your project. I will often use a scrap piece of cardboard to brush off the excess paint before applying it to my project.) Because the pallets were already stained a dark brown, white was the perfect finishing touch. It was well worth the $30 for all the extra planks I got as well as the time saved not having to stain and dry before applying the dry brushed white coat.
Other Elements in the Design:
- I absolutely love the look of birch and had purchased some birch scrap wood a few weeks back knowing I wanted to somehow incorporate it into my finished project. I decided to use the milk can I already had as a “vase” for the birch. I wrapped the branches in twine, added a simple embellishment and a few sprigs of white “ting” to finish off the arrangement.

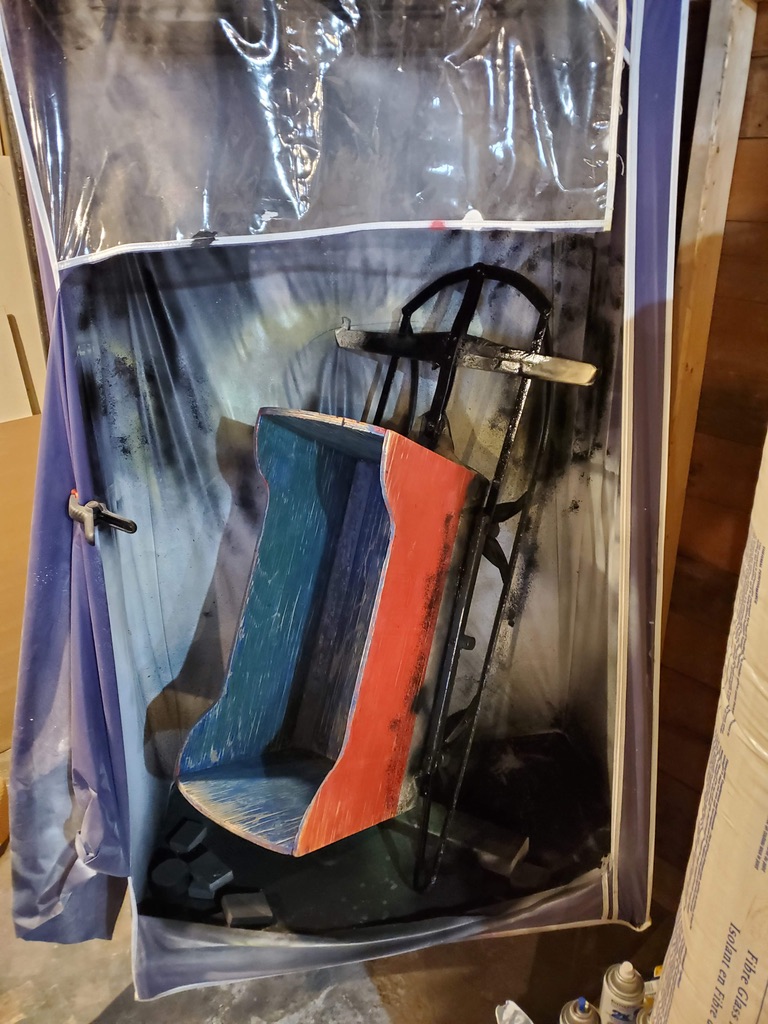
- As mentioned before, I knew that I didn’t want the decor to be too Christmassy, so I aimed at more of a winter look. I found this old rotting sleigh on Kijiji for $30. I scraped and sanded it to removed most of the peeling paint and then gave it two coats of exterior white paint. Once thoroughly dry, I sanded it back to distress it slightly. I also gave the metal gliders a coat of black spray paint in my spray tent. I love the way it turned out. All I added to the sleigh was a plaid blanket that I picked up for a few bucks at a thrift store.


- The front door holds the rag wreath that I made a few years ago. I still love the white shabby chic look.

- On the opposite side of the front door, I placed a small artificial tree. I decorated it very simply with white lights, pinecones and tufts of white artificial snow. I purposely chose not to use ornaments as I figured the simple wintery look would allow me to leave the display up through the winter. ( I guess I could also use ornaments and then replace them with pinecones/snow after Christmas!?…Maybe next year!)

- I picked up this beautiful antique speckled pot at an antique sale this fall. I love it and it is the perfect container for the collection of dollar store snowballs!

- I used scrap wood to create these simple wooden presents that can be removed after Christmas. Once again, I applied white paint using the dry brush technique and then added burlap and twine for a simple rustic look.

- The finishing touches: To finish off my winter/Christmas vignette, I added a few garage sale finds…..a vintage suitcase, an antique sewing machine drawer filled with pinecones and a very weathered chair (not bad for a $1). I also used a grapevine wreath I had in my basement, a galvanize pitcher and lantern from my summer decor and an antique type writer with the beginnings of a “letter to Santa”. (I will remove the typewriter after Christmas.)


I love the way it all came together in the end. Sometimes it is hard to envision what the finished design will look like. I had so many ideas and items I wanted to incorporate, but really had to wait until I set it up to see what would work and where.
I’m already planning a fall porch design for next year….a back to school theme. I already have something on my “To Do List” for next summer! Yikes!!


